 |
I decided to use spruce and black
walnut for my first couple of flutes, saving my nicer woods for
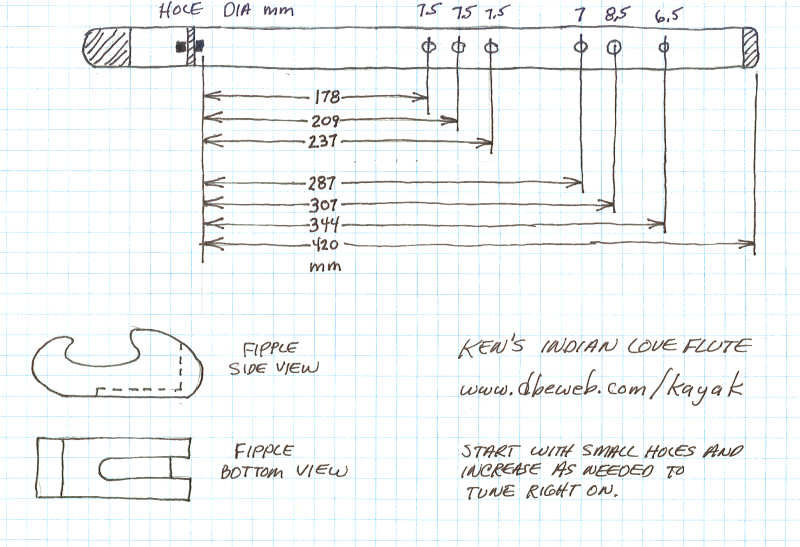
after the experimental stage. I want to build a "G4" flute, so
overall dimensions will be 3/4" ID, 1-1/8" OD, approx 20" long, with 4"
set aside for the pre-air chamber, and 16" set aside for the air
column. With no holes, it should resonate at 392 Hz. I will
build it with no tuning holes, trim it until I get the right low note,
then calculate, drill, and test each tone hole, one at a time.
Once I determine the locations, the 2nd flute will be a
breeze!
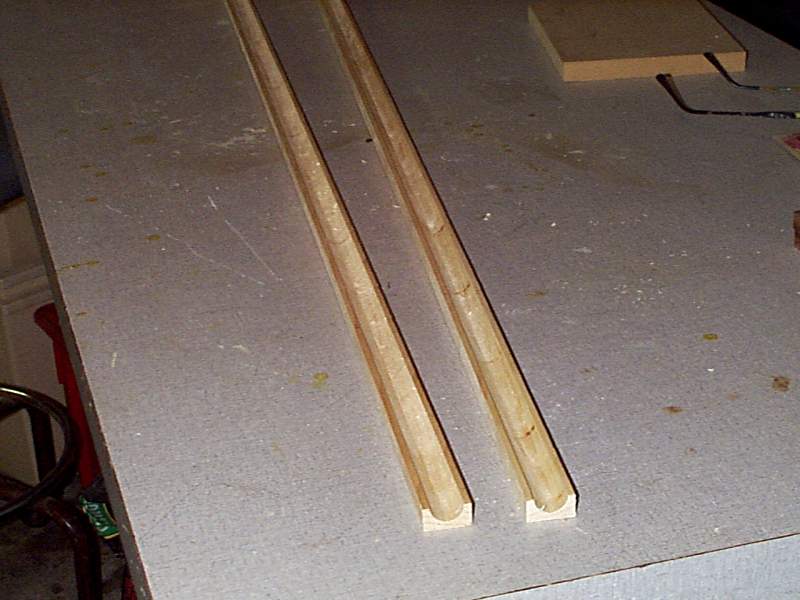
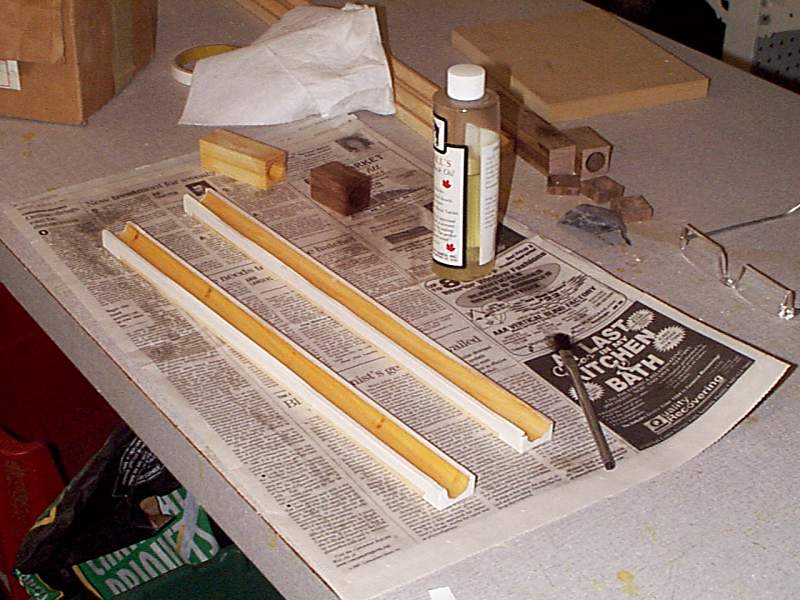
To begin, I've ripped two 4' strips of spruce so they measured 1-1/8" x 9/16" each. Then I used a 3/4" grooving bit on my router table to cut a round groove into each strip, as shown in the photo. |
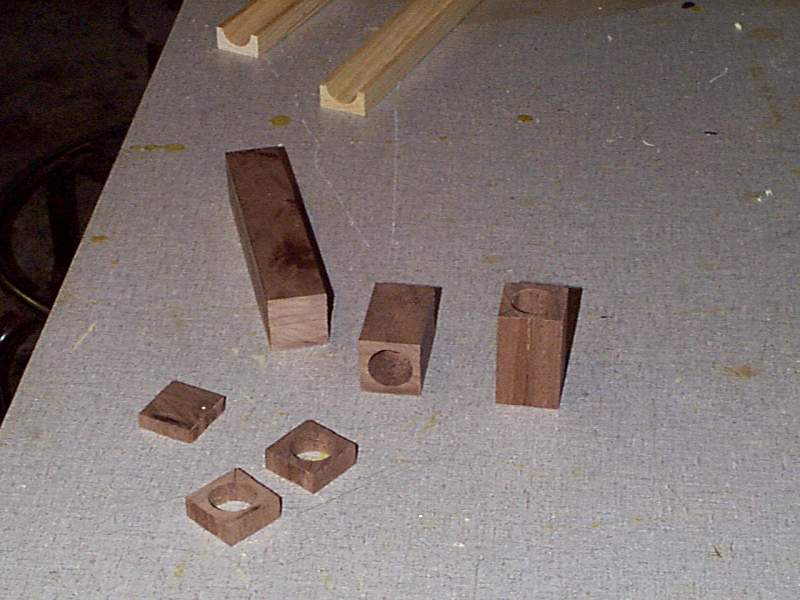 |
Next I fabricated some parts from black walnut that will comprise the decorative end piece, the blow-hole, and the solid spacer at the chiff & fipple location. End-to-end, the flute body will consist of 5 pieces, 4 of those made from 2 pieces each, but I have faith in epoxy. The spacer is 1/4" thick, the decorative end piece is 3/8" thick, and the blow hole is 1-3/4" long. A 3/4" hole was bored 1" into one end of the blow-hole, and a 1/8" hole completes the air passage to the outside world. |
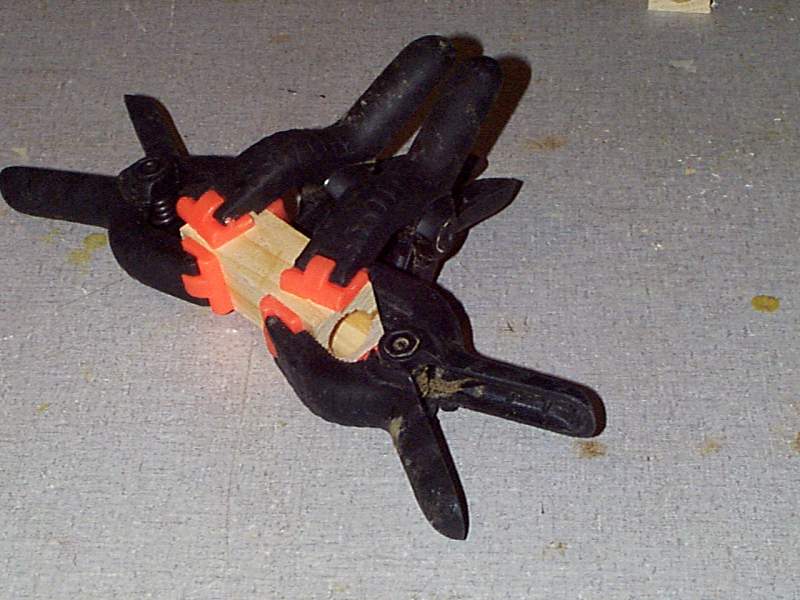 |
I cut off 2 pieces of routed spruce 3" long, to complete the pre-air chamber volume (1" in the walnut mouthpiece and 3" with this assembly). Here I am epoxying the two halves together. With the solid 1/4" thick walnut divider, the rectangular holes on either side turn out to be notches, easy to make, and easy to undercut on the air column end. This large pre-air chamber softens the blow, and makes the flute sound more mellow. |
 |
The next step is to waterproof all the inside surfaces of the flute. I am using FDA approved linseed oil, made for use with butcher blocks. Several coats only take a few hours to apply, and will effectively seal the inside of the flute and allow occasional swabbing out. You can see that I've applied masking tape to protect the glue joints, as epoxy does not stick to an oiled surface! |
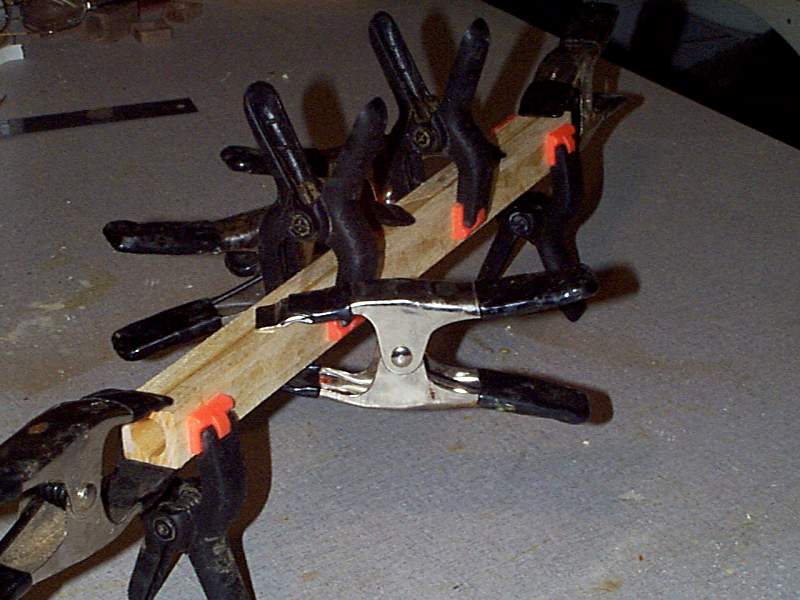 |
The main flute body is being epoxied together. Ordinarily you would drill the tone holes first, but I don't yet know their location, or the final length of the flute. This will allow me to tune the fundamental low note of the flute, and then place the tone holes afterward. |
 |
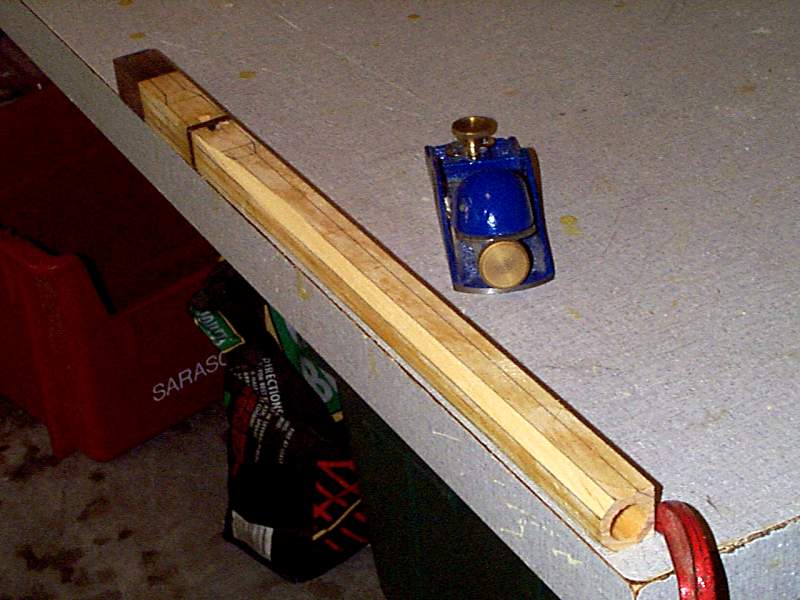
The assembled hollow pre-chamber - The longer section of black walnut will be carved to a smooth "blow-hole," and the thinner walnut section at the front serves as a blocking piece. Note the small rectangular exit opening at the top, directly behind the blocking plate. |
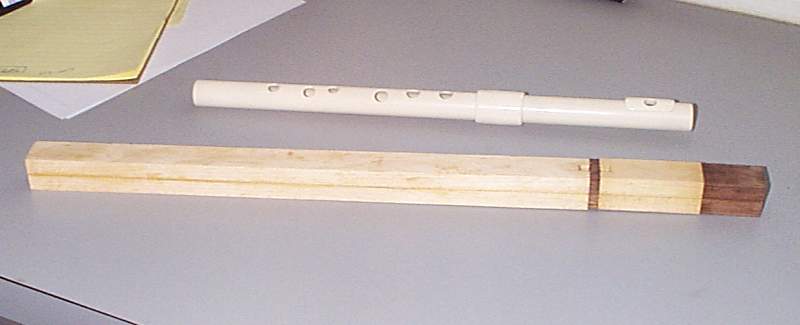 |
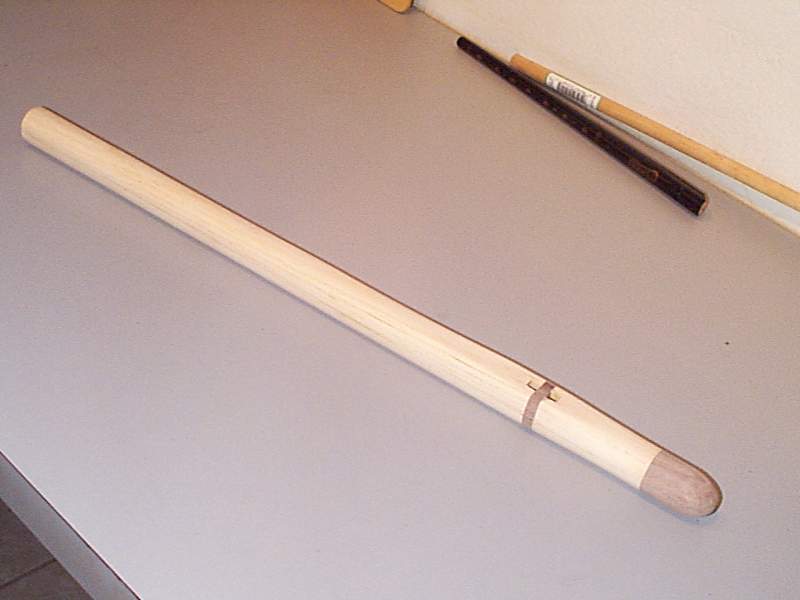
All of the sections except for the walnut trim piece at the front of the flute have been epoxied together. This photo show it in comparison to one of my CPVC G flutes, from Rick Millers flute pages. |
 |
I drew trimming lines on the square flute body in the same fashion as the kayak paddles I've made. In this photo I've begun to plane to the lines, forming an octagonal cross-section. A knife could be used as well. Next I will plane those corners off, and finish the rough shaping with coarse sandpaper. |
 |
It's starting to look like a Native American flute! Using sandpaper, I knocked down the corners of the octagon until it started to look like a cylinder. Note the flat area above the fipple, it has to remain flat to mate up properly with the "totem." The totem is the carved decoration that fits over the fipple and directs the air from the air outlet hole to the embouchure. |
 |
Here's the totem I began carving. It is a piece of mahogany that spans the 2 air holes. A 1/32" spacer with a slot cut into it slides under the totem to provide an air passage. Tests at this point using the Tuner program (see links below) showed the fundamental note at 350 Hz, or an F4. I will have to shorten the tube or drill a hole at the appropriate length to obtain a G flute. |
 |
Here's an improvement I was able to make to the totem - Instead of stacking it with a 1/32" spacer to allow airflow into the resonant air chamber, I simply milled a 1/32" deep x 3/16" wide slot into the bottom of the totem that serves the same purpose. It produces a louder sound than the spacer arrangement I tried first, probably because it eliminates the added spacer thickness at the blown edge. It also seems easier to obtain the second octave. |
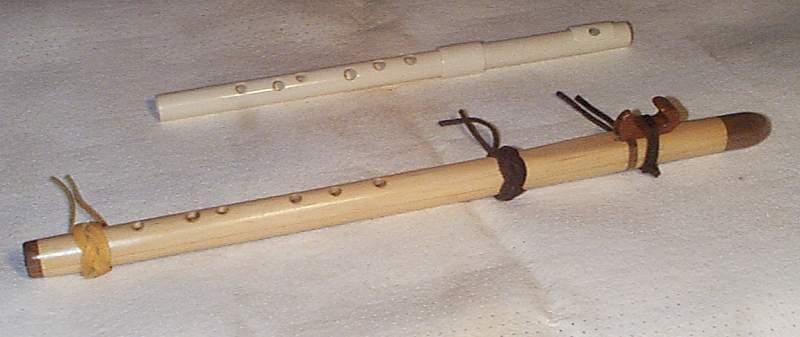 |
The pieces were assembled, sanded, and the tone hole locations calculated and drilled. A finish of 5 coats of non-toxic water based polyeurethane varnish was applied. These were lovingly rubbed on with a rag. Lastly 2 "turks head" knots tied with leather straps were affixed for decoration, and the totem was tied in place with the same material. The new wooden flute is shown for size comparison alongside one of my standard "G" CPVC flutes. |
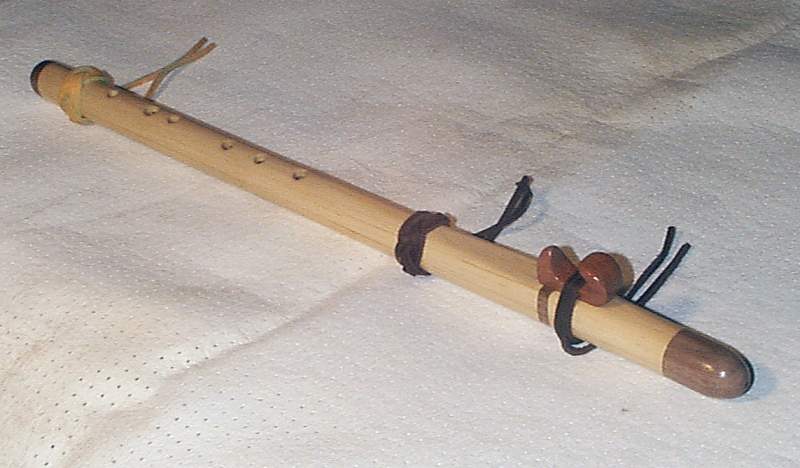 |
Another view of the wooden native American "Love Flute." |
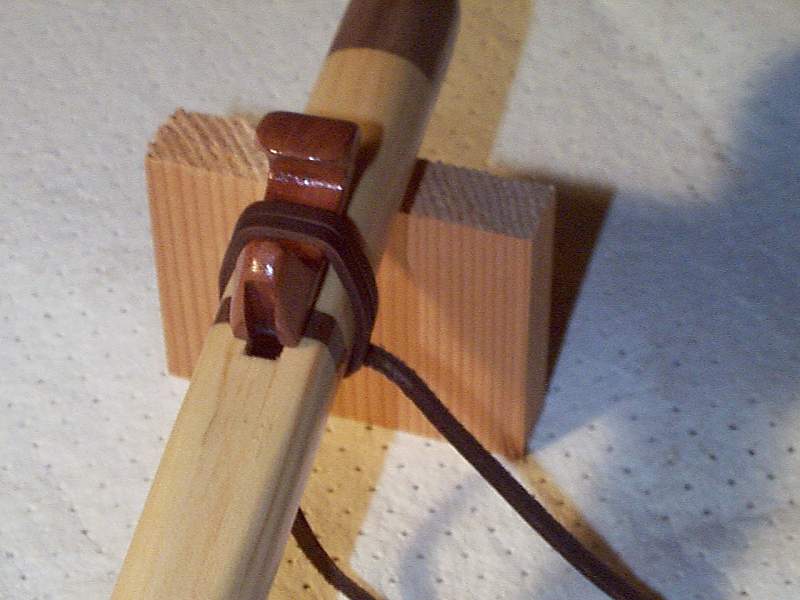 |
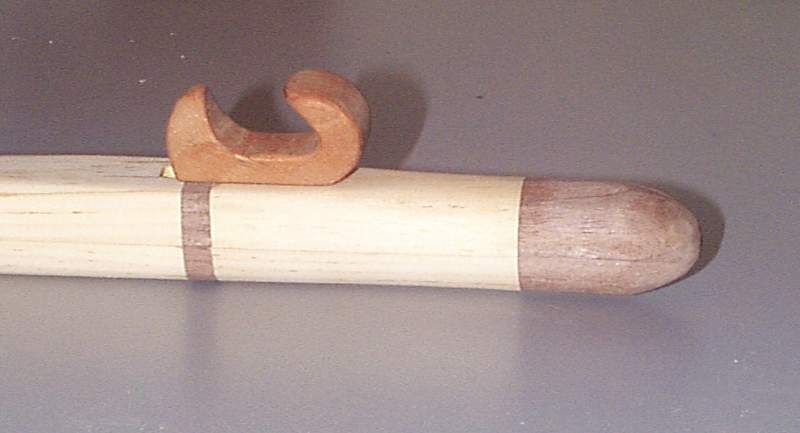
Closeup of the totem showing its positioning relative to the fipple. |
 |
Closeup of the black walnut end piece and the turk's head leather decoration applied to the end of the flute. |
|
NEW! Reader Flute Designs! See a very nice adaptation of my flute design done by Gordon Hill on THIS PAGE. This flute features a wood-burned wrap-around Tribal Sun, and an extended mouthpiece. Gordon tells me the sound produces an almost zen-like effect when he's playing! Cool! Excellent job, Gordon. I really like the wood-burning, a timeless effect. Others of you who have built this flute or an adaptation are encouraged to send pictures and a brief description to me, and I'll include them here. |