Ken's
Gibson "Les Paul Special" Neck Repair Page 2
I spent a bit more time on this project than usual this evening, about an hour-and-a-half, and made what looks like a significant amount of progress. First of all, the neck repair turned out to be far simpler than I had expected. Once everything was apart, the cracked neck was very easy to align and glue.
I used the truss rod to hold the neck in tension, while 2 clamps were used to pull the crack together both horizontally and vertically. The result is a perfectly aligned, straight and flat neck. The photos show the simplicity of the setup. The neck did not require any jigging toward the headstock, everything just pulled into perfect alignment when the clamps and truss rod were tightened. Whew!
Standard carpenter's wood glue was used, as it is very strong, stronger than the wood itself. It is a better choice than epoxy when heavy clamping pressures are used, as epoxy needs a filler and a thick glue line to develop strength - I wanted the crack closed, with as thin of a glue line as possible. I began with the crack wide open, and squeezed in glue from all directions. I then tighted the truss rod until it brought the joint together, installed the clamps, and progressively tightened everything. I removed the glue as the excess was squeezed out, and kept tightening until the neck assumed it's original dimensions. That took all of 5 minutes. That part of my bench is dead flat, and I laid wax paper under the neck in case any glue got underneath.
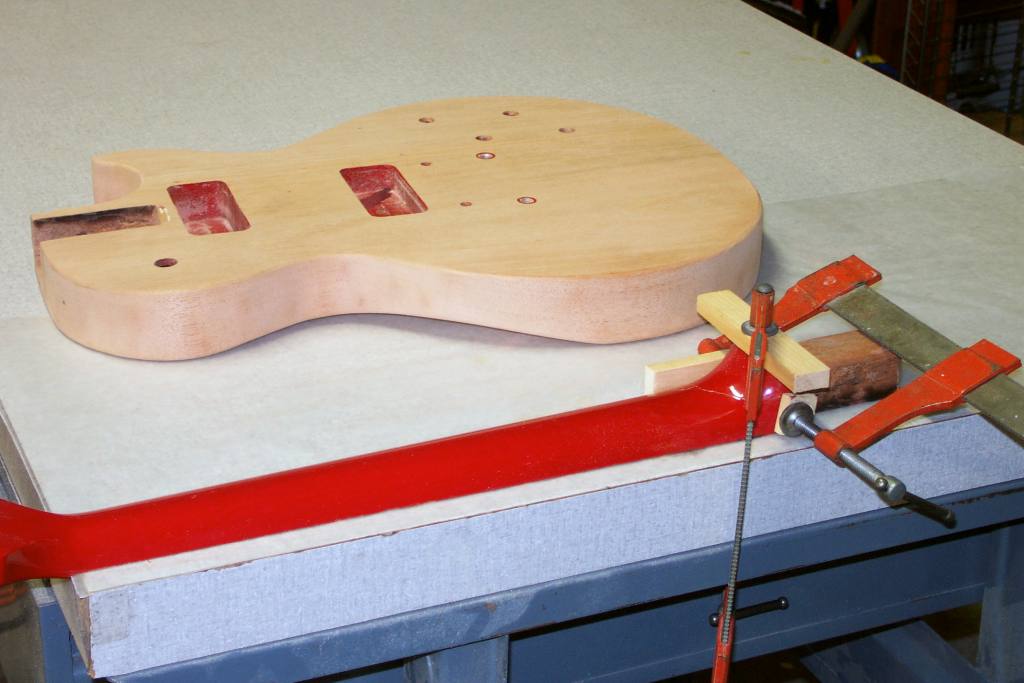
Since the repair was over almost before it began, I decided to use the hour or so I reserve for this project to sand the body. Using my trusty ROS, the body came clean in fairly short order. No dings or scars were very deep, and I ended up with a near-perfect body to work with. I'll probably use automotive lacquer to return the guitar to its original color, with a mirror transparent finish. There is a crack in the neck pocket that I hadn't noticed, it could have happened when I removed the neck, or more likely when the neck was cracked. A bit of wood glue and some clamping, and it will be better than new, and invisible as well.
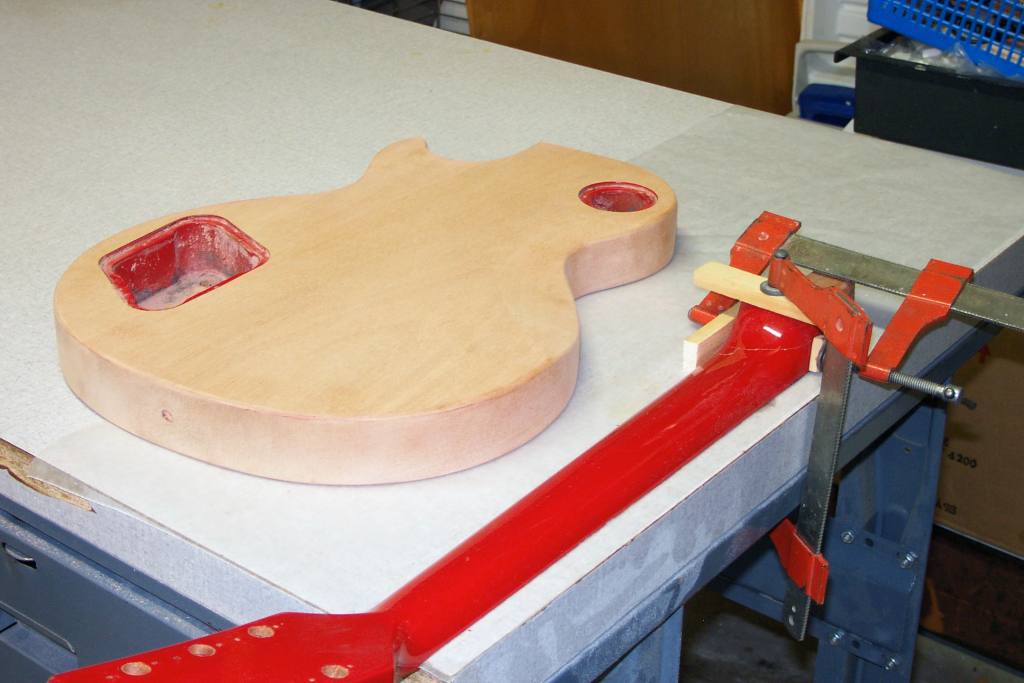
This picture below shows the results of Day 4 . . . The neck pocket on the body has been glued, and the Neck has been stripped of its paint, ready to be touched up here & there around the crack - We're getting closer to spraying some lacquer!

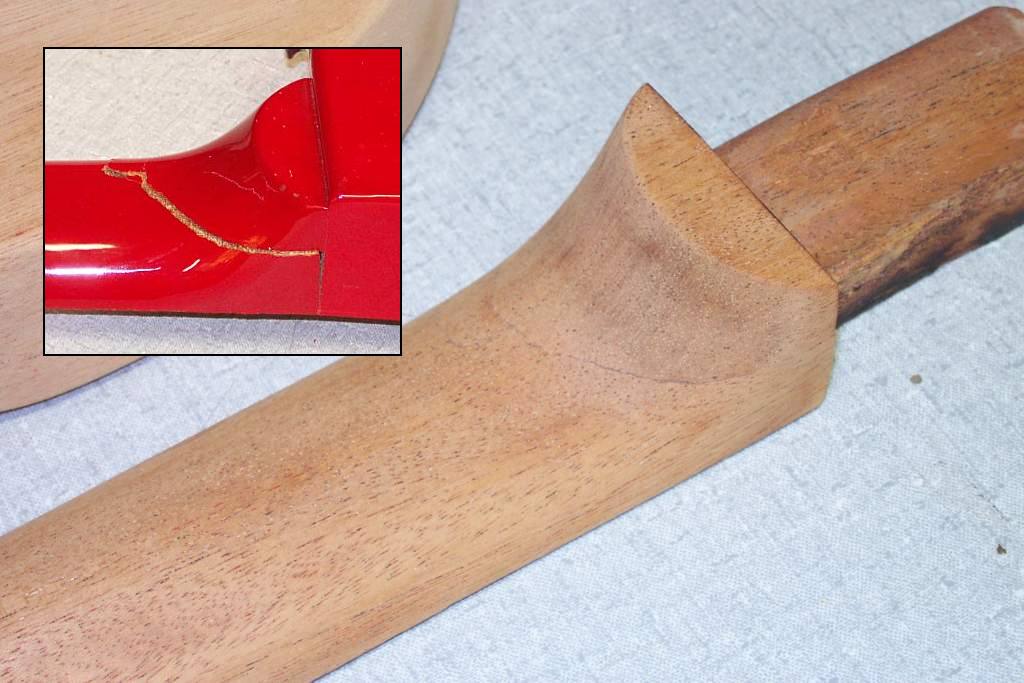
This is a closeup of the former crack location. A thin glue line can be seen, but it should all but disappear under the lacquer that's coming. It's going to be as strong as new, because the crack followed the grain - Had we been gluing endgrain, it would be a different story . . .
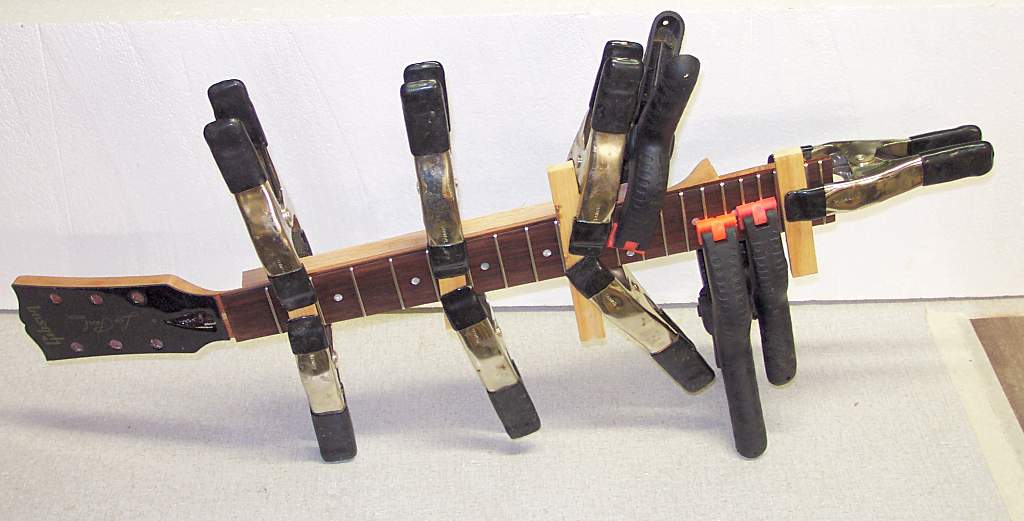
Now it is going back together! Today I polished the fretboard with #0000 steelwool, and gave it a few coats of Johnson's Paste Wax. That really made it look new again. Then I cut two short wooden dowels to fit the holes that index the fretboard to the neck. I used carpenter's yellow wood glue again, brushing it onto both the neck and fretboard back. I then clamped the two together as shown below. This will allow for future maintenance, as the fretboard can be removed the same way I originally removed it. Sighting along either edge of the fretboard show it to be dead flat.
<== GO BACK TO PAGE 1 GOTO PAGE 3 ==>